
# 首页模块
# 01-首页-路由与组件
目的: 搭建页面架子,便于接下来进行页面布局组件编写。
- 根组件下定义一级路由组件出口
src/App.vue
<template>
  <!-- 一级路由 -->
  <router-view></router-view>
</template>
- 一级路由布局容器
src/views/Layout.vue
<template>
  <nav>顶部通栏</nav>
  <header>头部</header>
  <main>
    <!-- 二级路由 -->
    <router-view></router-view>
  </main>
  <footer>底部</footer>
</template>

<script>
export default {
  name: 'xtx-layout'
}
</script>

<style scoped lang='less'></style>
- 二级路由首页组件
src/views/home/index.vue
<template>
  <div class='xtx-home-page'>
    首页
  </div>
</template>

<script>
export default {
  name: 'xtx-home-page'
}
</script>

<style scoped lang='less'></style>
- 配置路由规则
src/router/index.js
import { createRouter, createWebHashHistory } from 'vue-router'

+const Layout = () => import('@/views/Layout')
+const Home = () => import('@/views/home/index')

const routes = [
+  {
+    path: '/',
+    component: Layout,
+    children: [
+      { path: '/', component: Home }
+    ]
+  }
]

const router = createRouter({
  history: createWebHashHistory(),
  routes
})

export default router
总结: 配置首页的路由规则,由Layout和首页组件组成。
# 02-首页-less的自动化导入
目的: 准备常用less变量,混入代码,完成自动导入。
1)准备要用的变量和混入代码
- 变量
src/assets/styles/variables.less
// 主题
@xtxColor:#27BA9B;
// 辅助
@helpColor:#E26237;
// 成功
@sucColor:#1DC779;
// 警告
@warnColor:#FFB302;
// 价格
@priceColor:#CF4444;
- 混入
src/assets/styles/mixins.less
// 鼠标经过上移阴影动画
.hoverShadow () {
  transition: all .5s;
  &:hover {
    transform: translate3d(0,-3px,0);
    box-shadow: 0 3px 8px rgba(0,0,0,0.2);
  }
}
less混入就是,申明一段css代码(选择器包裹的代码)或者函数,在其他css选择器调用,可复用包裹的代码。
2)完成自动注入公用变量和混入
遇到问题: 每次使用公用的变量和mixin的时候需要单独引入到文件中。

解决方法: 使用vuecli的style-resoures-loader插件来完成自动注入到每个less文件或者vue组件中style标签中。
- 在当前项目下执行一下命令
vue add style-resources-loader,添加一个vuecli的插件
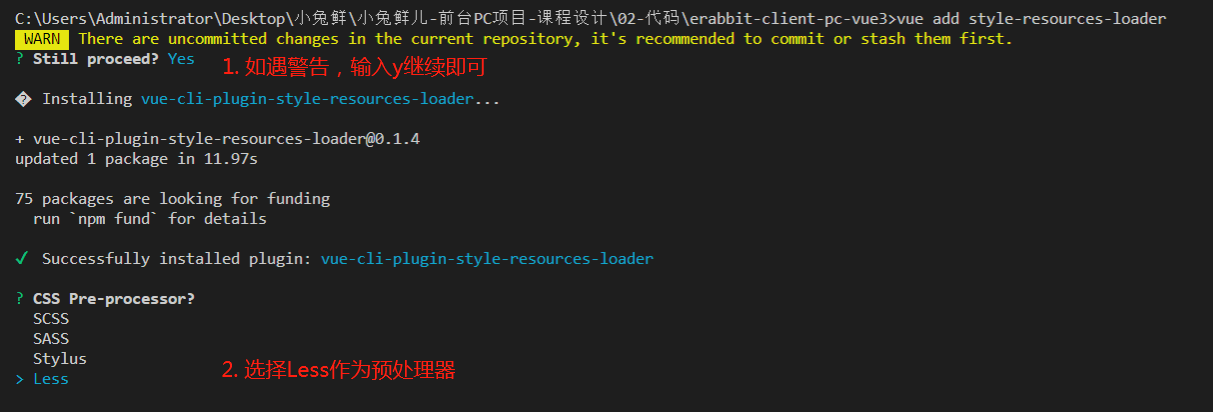
- 安装完毕后会在
vue.config.js中自动添加配置,如下:
module.exports = {
  pluginOptions: {
    'style-resources-loader': {
      preProcessor: 'less',
      patterns: []
    }
  }
}
- 把你需要注入的文件配置一下后,重启服务即可。
+const path = require('path')
module.exports = {
  pluginOptions: {
    'style-resources-loader': {
      preProcessor: 'less',
      patterns: [
+        path.join(__dirname, './src/assets/styles/variables.less'),
+        path.join(__dirname, './src/assets/styles/mixins.less')
      ]
    }
  }
}
总结: 知道如何定义less变量和混入代码并使用他们,通过vue-resources-loader完成代码注入再每个less文件和vue组件中。
# 03-首页-样式重置与公用
目的: 准备网站所需的重置样式代码,以及一些公用样式代码。
- 重置样式
执行 npm i normalize.css 安装重置样式的包,然后在 main.js 导入 normalize.css 即可。
import { createApp } from 'vue'
import App from './App.vue'
import router from './router'
import store from './store'

+import 'normalize.css'

createApp(App).use(store).use(router).mount('#app')
- 公用样式
新建文件 src/assets/styles/common.less 在该文件写入常用的样式,然后在 main.js 导入即可。
src/assets/styles/common.less
// 重置样式
* {
  box-sizing: border-box;
 }

 html {
   height: 100%;
   font-size: 14px;
 }
 body {
   height: 100%;
   color: #333;
   min-width: 1240px;
   font: 1em/1.4 'Microsoft Yahei', 'PingFang SC', 'Avenir', 'Segoe UI', 'Hiragino Sans GB', 'STHeiti', 'Microsoft Sans Serif', 'WenQuanYi Micro Hei', sans-serif
 }

 ul,
 h1,
 h3,
 h4,
 p,
 dl,
 dd {
   padding: 0;
   margin: 0;
 }

 a {
   text-decoration: none;
   color: #333;
   outline: none;
 }

 i {
   font-style: normal;
 }

 input[type="text"],
 input[type="search"],
 input[type="password"],
 input[type="checkbox"]{
   padding: 0;
   outline: none;
   border: none;
   -webkit-appearance: none;
   &::placeholder{
     color: #ccc;
   }
 }

 img {
   max-width: 100%;
   max-height: 100%;
   vertical-align: middle;
 }

 ul {
   list-style: none;
 }

 #app {
   background: #f5f5f5;
   user-select: none;
 }

 .container {
   width: 1240px;
   margin: 0 auto;
   position: relative;
 }

 .ellipsis {
   white-space: nowrap;
   text-overflow: ellipsis;
   overflow: hidden;
 }

 .ellipsis-2 {
   word-break: break-all;
   text-overflow: ellipsis;
   display: -webkit-box;
   -webkit-box-orient: vertical;
   -webkit-line-clamp: 2;
   overflow: hidden;
 }

 .fl {
   float: left;
 }

 .fr {
   float: right;
 }

 .clearfix:after {
   content: ".";
   display: block;
   visibility: hidden;
   height: 0;
   line-height: 0;
   clear: both;
 }
src/main.js
import { createApp } from 'vue'
import App from './App.vue'
import router from './router'
import store from './store'

import 'normalize.css'
+import '@/assets/styles/common.less'

createApp(App).use(store).use(router).mount('#app')
总结: 重置样式使用normalize.css,项目公用样式common.less
# 04-首页-顶部通栏布局
目的: 完成顶部通栏组件。

大致步骤:
1)在 public/index.html 引入字体图标文件。
    <link rel="icon" href="<%= BASE_URL %>favicon.ico">
+    <link rel="stylesheet" href="//at.alicdn.com/t/font_2143783_iq6z4ey5vu.css">
    <title><%= htmlWebpackPlugin.options.title %></title>
2)在 src/components/ 下新建 app-topnav.vue 组件,基础布局如下:
<template>
  <nav class="app-topnav">
    <div class="container">
      <ul>
        <li><a href="javascript:;"><i class="iconfont icon-user"></i>周杰伦</a></li>
        <li><a href="javascript:;">退出登录</a></li>
        <li><a href="javascript:;">请先登录</a></li>
        <li><a href="javascript:;">免费注册</a></li>
        <li><a href="javascript:;">我的订单</a></li>
        <li><a href="javascript:;">会员中心</a></li>
        <li><a href="javascript:;">帮助中心</a></li>
        <li><a href="javascript:;">关于我们</a></li>
        <li><a href="javascript:;"><i class="iconfont icon-phone"></i>手机版</a></li>
      </ul>
    </div>
  </nav>
</template>
<script>
export default {
  name: 'AppTopnav'
}
</script>
<style scoped lang="less">
.app-topnav {
  background: #333;
  ul {
    display: flex;
    height: 53px;
    justify-content: flex-end;
    align-items: center;
    li {
      a {
        padding: 0 15px;
        color: #cdcdcd;
        line-height: 1;
        display: inline-block;
        i {
          font-size: 14px;
          margin-right: 2px;
        }
        &:hover {
          color: @xtxColor;
        }
      }
      ~ li {
        a {
          border-left: 2px solid #666;
        }
      }
    }
  }
}
</style>
3)在 src/views/Layout.vue 中导入使用。
<template>
+  <AppTopnav/>
  <header>头部</header>
  <main>
    <!-- 二级路由 -->
    <router-view></router-view>
  </main>
  <footer>底部</footer>
</template>

<script>
+import AppTopnav from '@/components/app-topnav'
export default {
  name: 'XtxLayout',
+  components: { AppTopnav }
}
</script>

<style scoped lang='less'></style>
4)根据当前的登录状态显示 用户名和退出登录
<script>
import { useStore } from 'vuex'
import { computed } from 'vue'
export default {
  name: 'AppTopnav',
  setup () {
      const store = useStore()
      const profile = computed(()=>{
          return store.state.user.profile
      })
      return { profile }
  }
}
</script>
        <template v-if="profile.token">
          <li><a href="javascript:;"><i class="iconfont icon-user"></i>{{profile.account}}</a></li>
          <li><a href="javascript:;">退出登录</a></li>
        </template>
        <template v-else>
          <li><a href="javascript:;">请先登录</a></li>
          <li><a href="javascript:;">免费注册</a></li>
        </template>
总结: 完成基础布局,根据用户信息动态展示导航菜单。
# 05-首页-头部布局
目的: 完成首页头部布局,了解结构。

大致步骤:
- 1)在
src/components/下新建app-header.vue组件,基础布局如下:
<template>
  <header class='app-header'>
    <div class="container">
      <h1 class="logo"><RouterLink to="/">小兔鲜</RouterLink></h1>
      <ul class="navs">
        <li class="home"><RouterLink to="/">首页</RouterLink></li>
        <li><a href="#">美食</a></li>
        <li><a href="#">餐厨</a></li>
        <li><a href="#">艺术</a></li>
        <li><a href="#">电器</a></li>
        <li><a href="#">居家</a></li>
        <li><a href="#">洗护</a></li>
        <li><a href="#">孕婴</a></li>
        <li><a href="#">服装</a></li>
        <li><a href="#">杂货</a></li>
      </ul>
      <div class="search">
        <i class="iconfont icon-search"></i>
        <input type="text" placeholder="搜一搜">
      </div>
      <div class="cart">
        <a class="curr" href="#">
          <i class="iconfont icon-cart"></i><em>2</em>
        </a>
      </div>
    </div>
  </header>
</template>

<script>
export default {
  name: 'AppHeader'
}
</script>

<style scoped lang='less'>
.app-header {
  background: #fff;
  .container {
    display: flex;
    align-items: center;
  }
  .logo {
    width: 200px;
    a {
      display: block;
      height: 132px;
      width: 100%;
      text-indent: -9999px;
      background: url(../assets/images/logo.png) no-repeat center 18px / contain;
    }
  }
  .navs {
    width: 820px;
    display: flex;
    justify-content: space-around;
    padding-left: 40px;
    li {
      margin-right: 40px;
      width: 38px;
      text-align: center;
      a {
        font-size: 16px;
        line-height: 32px;
        height: 32px;
        display: inline-block;
      }
      &:hover {
        a {
          color: @xtxColor;
          border-bottom: 1px solid @xtxColor;
        }
      }
    }
  }
  .search {
    width: 170px;
    height: 32px;
    position: relative;
    border-bottom: 1px solid #e7e7e7;
    line-height: 32px;
    .icon-search {
      font-size: 18px;
      margin-left: 5px;
    }
    input {
      width: 140px;
      padding-left: 5px;
      color: #666;
    }
  }
  .cart {
    width: 50px;
    .curr {
      height: 32px;
      line-height: 32px;
      text-align: center;
      position: relative;
      display: block;
      .icon-cart{
        font-size: 22px;
      }
      em {
        font-style: normal;
        position: absolute;
        right: 0;
        top: 0;
        padding: 1px 6px;
        line-height: 1;
        background: @helpColor;
        color: #fff;
        font-size: 12px;
        border-radius: 10px;
        font-family: Arial;
      }
    }
  }
}
</style>
- 2)在
src/views/Layout.vue中导入使用。
<template>
  <AppTopnav/>
+  <AppHeader/>
  <main>
    <!-- 二级路由 -->
    <router-view></router-view>
  </main>
  <footer>底部</footer>
</template>

<script>
import AppTopnav from '@/components/app-topnav'
+import AppHeader from '@/components/app-header'
export default {
  name: 'XtxLayout',
+  components: { AppTopnav, AppHeader }
}
</script>

<style scoped lang='less'></style>
总结: 准备了一个静态的头部组件,了解其结构。
# 06-首页-底部布局
目的: 完成首页底部布局。
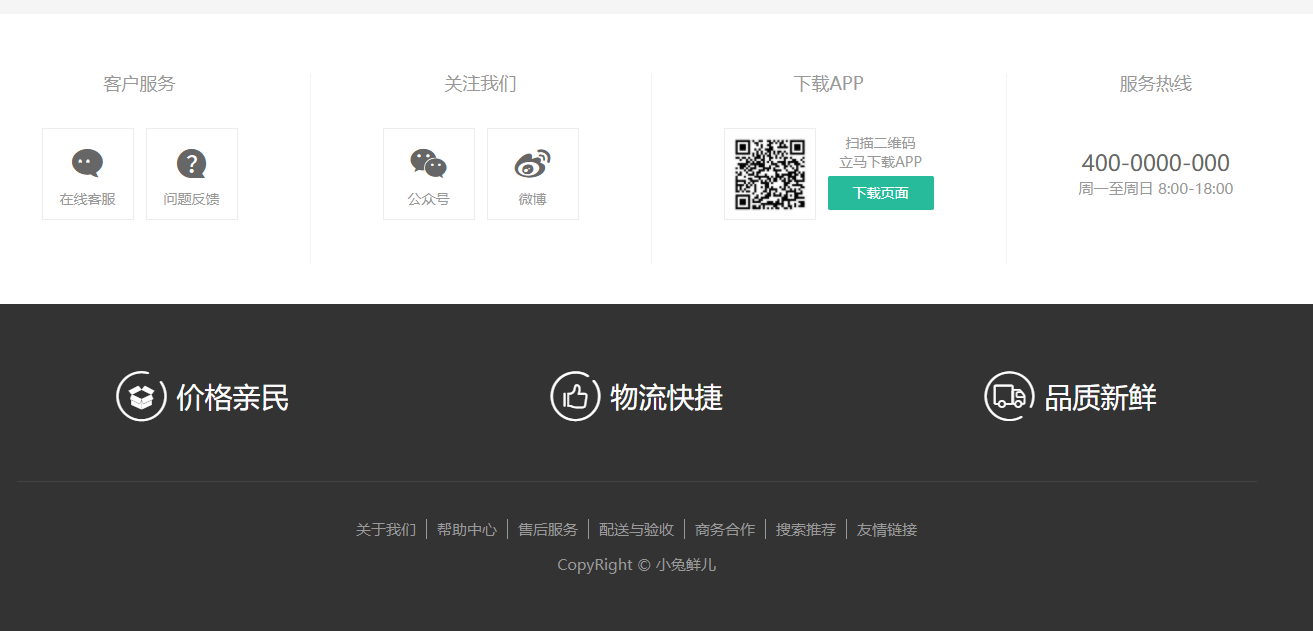
首先,在 src/components/ 下新建 app-footer.vue 组件,基础布局如下:
<template>
  <footer class="app-footer">
    <!-- 联系我们 -->
    <div class="contact">
      <div class="container">
        <dl>
          <dt>客户服务</dt>
          <dd><i class="iconfont icon-kefu"></i> 在线客服</dd>
          <dd><i class="iconfont icon-question"></i> 问题反馈</dd>
        </dl>
        <dl>
          <dt>关注我们</dt>
          <dd><i class="iconfont icon-weixin"></i> 公众号</dd>
          <dd><i class="iconfont icon-weibo"></i> 微博</dd>
        </dl>
        <dl>
          <dt>下载APP</dt>
          <dd class="qrcode"><img src="../assets/images/qrcode.jpg" /></dd>
          <dd class="download">
            <span>扫描二维码</span>
            <span>立马下载APP</span>
            <a href="javascript:;">下载页面</a>
          </dd>
        </dl>
        <dl>
          <dt>服务热线</dt>
          <dd class="hotline">400-0000-000 <small>周一至周日 8:00-18:00</small></dd>
        </dl>
      </div>
    </div>
    <!-- 其它 -->
    <div class="extra">
      <div class="container">
        <div class="slogan">
          <a href="javascript:;">
            <i class="iconfont icon-footer01"></i>
            <span>价格亲民</span>
          </a>
          <a href="javascript:;">
            <i class="iconfont icon-footer02"></i>
            <span>物流快捷</span>
          </a>
          <a href="javascript:;">
            <i class="iconfont icon-footer03"></i>
            <span>品质新鲜</span>
          </a>
        </div>
        <!-- 版权信息 -->
        <div class="copyright">
          <p>
            <a href="javascript:;">关于我们</a>
            <a href="javascript:;">帮助中心</a>
            <a href="javascript:;">售后服务</a>
            <a href="javascript:;">配送与验收</a>
            <a href="javascript:;">商务合作</a>
            <a href="javascript:;">搜索推荐</a>
            <a href="javascript:;">友情链接</a>
          </p>
          <p>CopyRight © 小兔鲜儿</p>
        </div>
      </div>
    </div>
  </footer>
</template>

<script>
export default {
  name: 'AppFooter'
}
</script>

<style scoped lang='less'>
.app-footer {
  overflow: hidden;
  background-color: #f5f5f5;
  padding-top: 20px;
  .contact {
    background: #fff;
    .container {
      padding: 60px 0 40px 25px;
      display: flex;
    }
    dl {
      height: 190px;
      text-align: center;
      padding: 0 72px;
      border-right: 1px solid #f2f2f2;
      color: #999;
      &:first-child {
        padding-left: 0;
      }
      &:last-child {
        border-right: none;
        padding-right: 0;
      }
    }
    dt {
      line-height: 1;
      font-size: 18px;
    }
    dd {
      margin: 36px 12px 0 0;
      float: left;
      width: 92px;
      height: 92px;
      padding-top: 10px;
      border: 1px solid #ededed;
      .iconfont {
        font-size: 36px;
        display: block;
        color: #666;
      }
      &:hover {
        .iconfont {
          color: @xtxColor;
        }
      }
      &:last-child {
        margin-right: 0;
      }
    }
    .qrcode {
      width: 92px;
      height: 92px;
      padding: 7px;
      border: 1px solid #ededed;
    }
    .download {
      padding-top: 5px;
      font-size: 14px;
      width: auto;
      height: auto;
      border: none;
      span {
        display: block;
      }
      a {
        display: block;
        line-height: 1;
        padding: 10px 25px;
        margin-top: 5px;
        color: #fff;
        border-radius: 2px;
        background-color: @xtxColor;
      }
    }
    .hotline {
      padding-top: 20px;
      font-size: 22px;
      color: #666;
      width: auto;
      height: auto;
      border: none;
      small {
        display: block;
        font-size: 15px;
        color: #999;
      }
    }
  }
  .extra {
    background-color: #333;
  }
  .slogan {
    height: 178px;
    line-height: 58px;
    padding: 60px 100px;
    border-bottom: 1px solid #434343;
    display: flex;
    justify-content: space-between;
    a {
      height: 58px;
      line-height: 58px;
      color: #fff;
      font-size: 28px;
      i {
        font-size: 50px;
        vertical-align: middle;
        margin-right: 10px;
        font-weight: 100;
      }
      span {
        vertical-align: middle;
        text-shadow: 0 0 1px #333;
      }
    }
  }
  .copyright {
    height: 170px;
    padding-top: 40px;
    text-align: center;
    color: #999;
    font-size: 15px;
    p {
      line-height: 1;
      margin-bottom: 20px;
    }
    a {
      color: #999;
      line-height: 1;
      padding: 0 10px;
      border-right: 1px solid #999;
      &:last-child {
        border-right: none;
      }
    }
  }
}
</style>
最后,在 src/views/Layout.vue 中导入使用。
<template>
  <AppTopnav/>
  <AppHeader/>
  <main class="app-body">
    <!-- 二级路由 -->
    <router-view></router-view>
  </main>
+  <AppFooter/>
</template>

<script>
import AppTopnav from '@/components/app-topnav'
import AppHeader from '@/components/app-header'
+import AppFooter from '@/components/app-footer'
export default {
  name: 'XtxLayout',
+  components: { AppTopnav, AppHeader, AppFooter }
}
</script>

<style scoped lang='less'>
+.app-body {
+  min-height: 600px;
+}
</style>
# 07-首页-头部分类导航组件
目的: 提取头部分类导航组件,提供给头部,和将来的吸顶头部使用。
第一步:提取头部导航为一个组件
- 新建
src/components/app-header-nav.vue组件。
<template>
  <ul class="app-header-nav">
    <li class="home"><RouterLink to="/">首页</RouterLink></li>
    <li><a href="#">美食</a></li>
    <li><a href="#">餐厨</a></li>
    <li><a href="#">艺术</a></li>
    <li><a href="#">电器</a></li>
    <li><a href="#">居家</a></li>
    <li><a href="#">洗护</a></li>
    <li><a href="#">孕婴</a></li>
    <li><a href="#">服装</a></li>
    <li><a href="#">杂货</a></li>
  </ul>
</template>

<script>
export default {
  name: 'AppHeaderNav'
}
</script>

<style scoped lang='less'>
.app-header-nav {
  width: 820px;
  display: flex;
  padding-left: 40px;
  position: relative;
  z-index: 998;
  li {
    margin-right: 40px;
    width: 38px;
    text-align: center;
    a {
      font-size: 16px;
      line-height: 32px;
      height: 32px;
      display: inline-block;
    }
    &:hover {
      a {
        color: @xtxColor;
        border-bottom: 1px solid @xtxColor;
      }
    }
  }
}
</style>
- 在
app-header.vue中使用组件。注意,删除结构和样式。
<template>
  <header class='app-header'>
    <div class="container">
      <h1 class="logo"><RouterLink to="/">小兔鲜</RouterLink></h1>
+      <AppHeaderNav />
      <div class="search">
        <i class="iconfont icon-search"></i>
        <input type="text" placeholder="搜一搜">
      </div>
      <div class="cart">
        <a class="curr" href="#">
          <i class="iconfont icon-cart"></i><em>2</em>
        </a>
      </div>
    </div>
  </header>
</template>

<script>
+import AppHeaderNav from './app-header-nav'
export default {
  name: 'AppHeader',
+  components: { AppHeaderNav }
}
</script>
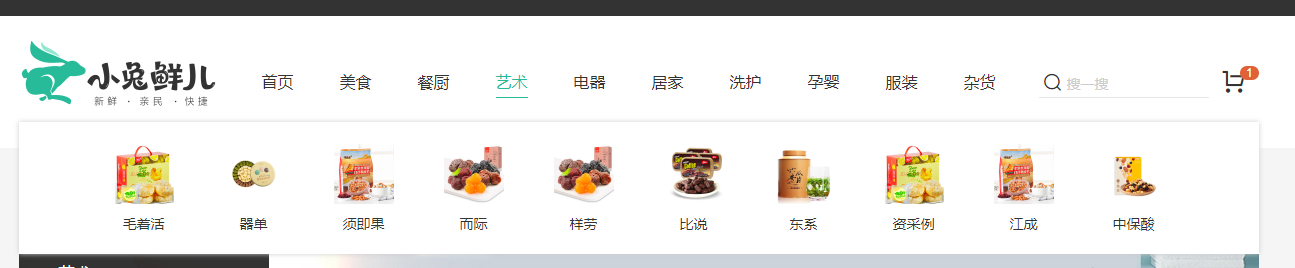
第二步:完善子级分类布局 src/components/app-header-nav.vue
<template>
  <ul class="app-header-nav">
    <li class="home"><RouterLink to="/">首页</RouterLink></li>
    <li>
      <a href="#">美食</a>
      <div class="layer">
        <ul>
          <li v-for="i in 10" :key="i">
            <a href="#">
              <img src="http://zhoushugang.gitee.io/erabbit-client-pc-static/uploads/img/category%20(4).png" alt="">
              <p>果干</p>
            </a>
          </li>
        </ul>
      </div>
    </li>
    <li><a href="#">餐厨</a></li>
    <li><a href="#">艺术</a></li>
    <li><a href="#">电器</a></li>
    <li><a href="#">居家</a></li>
    <li><a href="#">洗护</a></li>
    <li><a href="#">孕婴</a></li>
    <li><a href="#">服装</a></li>
    <li><a href="#">杂货</a></li>
  </ul>
</template>

<script>
export default {
  name: 'AppHeaderNav'
}
</script>

<style scoped lang='less'>
.app-header-nav {
  width: 820px;
  display: flex;
  justify-content: space-around;
  padding-left: 40px;
  position: relative;
  z-index: 998;
  > li {
    margin-right: 40px;
    width: 38px;
    text-align: center;
    > a {
      font-size: 16px;
      line-height: 32px;
      height: 32px;
      display: inline-block;
    }
    &:hover {
      > a {
        color: @xtxColor;
        border-bottom: 1px solid @xtxColor;
      }
      > .layer {
        height: 132px;
        opacity: 1;
      }
    }
  }
}
.layer {
  width: 1240px;
  background-color: #fff;
  position: absolute;
  left: -200px;
  top: 56px;
  height: 0;
  overflow: hidden;
  opacity: 0;
  box-shadow: 0 0 5px #ccc;
  transition: all .2s .1s;
  ul {
    display: flex;
    flex-wrap: wrap;
    padding: 0 70px;
    align-items: center;
    height: 132px;
    li {
      width: 110px;
      text-align: center;
      img {
        width: 60px;
        height: 60px;
      }
      p {
        padding-top: 10px;
      }
      &:hover {
        p {
          color: @xtxColor;
        }
      }
    }
  }
}
</style>
# 08-首页-头部分类导航渲染
目的: 实现头部一级分类和二级分类渲染。
基本步骤:
- 定义一个常量数据和后台保持一致(约定好9大分类),这样不请求后台就能展示一级分类,不至于白屏。
- 在API目录定义接口函数
- 在vuex中的category模块,基于常量数据定义state数据,定义修改分类列表函数,定义获取数据函数。
- 在Layout组件获取调用actions获取数据,在头部导航组件渲染即可。
落地代码:
- 定义九个分类常量数据
src/api/constants.js
// 顶级分类
export const topCategory = [
  '居家',
  '美食',
  '服饰',
  '母婴',
  '个护',
  '严选',
  '数码',
  '运动',
  '杂货'
]
- 定义API函数
src/api/category.js
// 定义首页需要的接口函数
import request from '@/utils/request'

/**
 * 获取首页头部分类数据
 */
export const findAllCategory = () => {
  return request('/home/category/head', 'get')
}
- vuex在category模块,来存储分类数据,提供修改和获取的函数。
src/store/modules/category.js
// 存储的分类数据
import { topCategory } from '@/api/constants'
import { findAllCategory } from '@/api/category'

export default {
  namespaced: true,
  state: () => {
    return {
      // 如果默认是[]数组,看不见默认的9个分类,等你数据加载完毕才会看到。
      // 所以:根据常量数据来生成一个默认的顶级分类数据,不会出现空白(没数据的情况)
      list: topCategory.map(item => ({ name: item }))
    }
  },
  // 加载数据成功后需要修改list所以需要mutations函数
  mutations: {
    setList (state, headCategory) {
      state.list = headCategory
    }
  },
  // 需要向后台加载数据,所以需要actions函数获取数据
  actions: {
    async getList ({ commit }) {
      const { result } = await findAllCategory()
      // 获取数据成功,提交mutations进行数据修改
      commit('setCategory', result)
    }
  }
}
- 获取数据在
src/views/Layout.vue初始化的时候
export default {
  name: 'Layout',
  components: {
    AppTopnav,
    AppHeader,
    AppFooter
  },
+  // 获取下分类数据
+  setup () {
+    const store = useStore()
+    store.dispatch('category/getList')
+  }
}
- 在头部导航组件渲染
src/compotents/app-header-nav.vue
import { useStore } from 'vuex'
import { computed } from 'vue'
export default {
  name: 'AppHeaderNav',
  setup () {
    const store = useStore()
    const list = computed(()=>{
      return store.state.category.list
    })
    return { list }
  }
}
  <ul class="app-header-nav">
    <li class="home"><RouterLink to="/">首页</RouterLink></li>
    <li v-for="item in list" :key="item.id">
      <RouterLink to="/">{{item.name}}</RouterLink>
      <div class="layer">
        <ul>
          <li v-for="sub in item.children" :key="sub.id">
            <RouterLink to="/">
              <img :src="sub.picture" alt="">
              <p>{{sub.name}}</p>
            </RouterLink>
          </li>
        </ul>
      </div>
    </li>
  </ul>
总结: 数据在vuex中管理,然后再组件使用数据进行渲染。
# 09-首页-头部分类导航交互
目的:实现点击的时候跳转,且能关闭二级分类弹窗。
描述:由于是单页面路由跳转不会刷新页面,css的hover一直触发无法关闭分类弹窗。
大致逻辑:
- 配置路由组件支持分类跳转
- 鼠标进入一级分类展示对应的二级分类弹窗
- 点击一级分类,二级分类,隐藏二级分类弹窗
- 离开一级分类,二级分类,隐藏二级分类弹窗
落地代码:
1) 配置路由和组件实现跳转
- 配置路由规则
src/router/index.js
+import TopCategory from '@/views/category'
+import SubCategory from '@/views/category/sub'

const routes = [
  {
    path: '/',
    component: Layout,
    children: [
      { path: '/', component: Home },
+      { path: '/category/:id', component: TopCategory },
+      { path: '/category/sub/:id', component: SubCategory }
    ]
  }
]
- 创建分类组件
src/views/category/index.vue
<template>
  <div>Top-Category</div>
</template>
<script>
export default {
  name: 'TopCategory'
}
</script>
<style scoped lang="less"></style>
src/views/category/sub.vue
<template>
  <div>Sub-Category</div>
</template>
<script>
export default {
  name: 'SubCategory'
}
</script>
<style scoped lang="less"></style>
2)跳转后关闭二级分类弹窗
- 给每一个一级分类定义控制显示隐藏的数据,
open布尔类型,通过open设置类名控制显示隐藏。 - 当进入一级分类的时候,将open改为true
- 当离开一级分类的时候,将open改为false
- 点击一级分类,二级分类,将open改为false
在vuex种给一级分类加open数据 src/store/modules/category.js
    async getCategory ({ commit }) {
      const { result } = await findHeadCategory()
      // 给一级分类加上一个控制二级分类显示隐藏的数据open
+      result.forEach(item => {
+        item.open = false
+      })
      // 获取数据成功,提交mutations进行数据修改
      commit('setCategory', result)
    }
添加了 show hide vuex的mutations函数修改 open src/store/modules/category.js
    // 修改当前一级分类下的open数据为true
    show (state, item) {
      const category = state.list.find(category => category.id === item.id)
      category.open = true
    },
    // 修改当前一级分类下的open数据为false
    hide (state, item) {
      const category = state.list.find(category => category.id === item.id)
      category.open = false
    }
再 头部导航组件 实现显示和隐藏 src/components/app-header-nav.vue
import { useStore } from 'vuex'
import { computed } from 'vue'
export default {
  name: 'AppHeaderNav',
  setup () {
    const store = useStore()
    const list = computed(()=>{
      return store.state.category.list
    })
+    const show = (item) => {
+      store.commit('category/show', item)
+    }
+    const hide = (item) => {
+      store.commit('category/hide', item)
+    }
+    return { list, show, hide}
  }
}
+    <li v-for="item in list" :key="item.id" @mouseenter="show(item)" @mouseleave="hide(item)">
+      <RouterLink :to="`/category/${item.id}`" @click="hide(item)">{{item.name}}</RouterLink>
      <div class="layer" :class="{open:item.open}">
        <ul>
          <li v-for="sub in item.children" :key="sub.id">
+            <RouterLink :to="`/category/sub/${sub.id}`" @click="hide(item)">
              <img :src="sub.picture" alt="">
              <p>{{sub.name}}</p>
            </RouterLink>
          </li>
        </ul>
      </div>
    </li>
-      // > .layer {
-      //   height: 132px;
-      //   opacity: 1;
-      // }
    }
  }
}
.layer {
+  &.open {
+    height: 132px;
+    opacity: 1;
+  }
总结: 再组件中调用vuex的mutation函数控制每个一级分类下二级分类的显示隐藏。
# 10-首页-吸顶头部组件-传统实现
目的: 完成吸顶头部
大致步骤:
- 准备吸顶组件基础布局
- 页面滚动到78px以上,显示吸顶组件。
落地代码:
- 新建
src/components/app-header-sticky.vue组件完成布局
<template>
  <div class="app-header-sticky">
    <div class="container">
      <RouterLink class="logo" to="/" />
      <AppHeaderNav />
      <div class="right">
        <RouterLink to="/" >品牌</RouterLink>
        <RouterLink to="/" >专题</RouterLink>
      </div>
    </div>
  </div>
</template>

<script>
import AppHeaderNav from './app-header-nav'
export default {
  name: 'AppHeaderSticky',
  components: { AppHeaderNav }
}
</script>

<style scoped lang='less'>
.app-header-sticky {
  width: 100%;
  height: 80px;
  position: fixed;
  left: 0;
  top: 0;
  z-index: 999;
  background-color: #fff;
  border-bottom: 1px solid #e4e4e4;
  .container {
    display: flex;
    align-items: center;
  }
  .logo {
    width: 200px;
    height: 80px;
    background: url(../assets/images/logo.png) no-repeat  right 2px;
    background-size: 160px auto;
  }
  .right {
    width: 220px;
    display: flex;
    text-align: center;
    padding-left: 40px;
    border-left: 2px solid @xtxColor;
    a {
      width: 38px;
      margin-right: 40px;
      font-size: 16px;
      line-height: 1;
      &:hover {
        color: @xtxColor;
      }
    }
  }
}
</style>
- 在滚动到78px完成显示效果,需要滑出动画。
第一步:默认移出顶部且完全透明,定义一个类回到默认吸顶位置完全显示。
.app-header-sticky {
  width: 100%;
  height: 80px;
  position: fixed;
  left: 0;
  top: 0;
  z-index: 999;
  background-color: #fff;
  border-bottom: 1px solid #e4e4e4;
+  transform: translateY(-100%);
+  opacity: 0;
+  &.show {
+    transition: all 0.3s linear;
+    transform: none;
+    opacity: 1;
+  }
第二步:组件渲染后,监听滚动距离超过78px隐藏
import AppHeaderNav from './app-header-nav'
+import { onMounted, ref } from 'vue'
export default {
  name: 'AppHeaderSticky',
  components: { AppHeaderNav },
+  setup () {
+    const y = ref(0)
+    onMounted(()=>{
+      window.onscroll = () => {
+        const scrollTop = document.documentElement.scrollTop
+        y.value = scrollTop
+      }
+    })
+    return { y }
+  }
}
+ <div class="app-header-sticky" :class="{show:y>=78}">
第三步:v-show使用,为了吸顶头部的内容不遮住不吸顶的头部。
+ <div class="container" v-show="y>=78">
# 11-首页-吸顶头部组件-组合API
目的: 体验基于组合API的@vueuse/core工具库
安装:@vueuse/core 包,它封装了常见的一些交互逻辑。
npm i @vueuse/core@4.9.0
使用:src/components/app-header-sticky.vue 组件
<template>
  <div class="app-header-sticky" :class="{show:y>=78}">
    <div class="container" v-show="y>=78">
      <RouterLink class="logo" to="/" />
      <AppHeaderNav />
      <div class="left">
        <RouterLink to="/" >品牌</RouterLink>
        <RouterLink to="/" >专题</RouterLink>
      </div>
    </div>
  </div>
</template>

<script>
import AppHeaderNav from './app-header-nav'
import { useWindowScroll } from '@vueuse/core'
export default {
  name: 'AppHeaderSticky',
  components: { AppHeaderNav },
  setup () {
    const { y } = useWindowScroll()
    return { y }
  }
}
</script>
总结:
useWindowScroll() 是@vueuse/core提供的api可返回当前页面滚动时候蜷曲的距离。x横向,y纵向
vue3.0组合API提供了更多逻辑代码封装的能力。@vueuse/core 基于组合API封装好用的工具函数。
# 12-首页主体-左侧分类-结构渲染
目的: 实现首页主体内容-左侧分类
大致步骤:
- 准备左侧分类组件和基础布局
- 从vuex中拿出9个分类数据,且值需要两个子分类,但是左侧是10个,需要补充一个品牌数据。
- 使用计算属性完成上面逻辑
- 渲染组件
落地代码:
- 准备组件:
src/views/home/components/home-category.vue
<template>
  <div class='home-category'>
    <ul class="menu">
      <li v-for="i in 10" :key="i">
        <RouterLink to="/">居家</RouterLink>
        <RouterLink to="/">洗漱</RouterLink>
        <RouterLink to="/">清洁</RouterLink>
      </li>
    </ul>
  </div>
</template>

<script>
export default {
  name: 'HomeCategory'
}
</script>

<style scoped lang='less'></style>
- 预览组件:
src/views/home/index.vue
<template>
  <div class="page-home">
    <div class="home-entry">
      <div class="container">
        <!-- 左侧分类 -->
        <HomeCategory />
      </div>
    </div>
  </div>
</template>
<script>
import HomeCategory from './components/home-category'
export default {
  name: 'PageHome',
  components: { HomeCategory }
}
</script>
<style scoped lang="less"></style>
- 从vuex中拿出分类,取出子分类中的前两项。给一级分类追加一项品牌,进行渲染。
<template>
  <div class='home-category'>
    <ul class="menu">
      <li v-for="item in menuList" :key="item.id">
        <RouterLink :to="`/category/${item.id}`">{{item.name}}</RouterLink>
        <template v-if="item.children">
          <RouterLink
            v-for="sub in item.children"
            :key="sub.id"
            :to="`/category/sub/${sub.id}`">
            {{sub.name}}
          </RouterLink>
        </template>
      </li>
    </ul>
  </div>
</template>

<script>
import { useStore } from 'vuex'
import { reactive, computed } from 'vue'
export default {
  name: 'HomeCategory',
  // 1. 获取vuex的一级分类,并且只需要两个二级分类
  // 2. 需要在组件内部,定义一个品牌数据
  // 3. 根据vuex的分类数据和组件中定义品牌数据,得到左侧分类完整数据(9分类+1品牌)数组
  // 4. 进行渲染即可
  setup () {
    const brand = reactive({
      id: 'brand',
      name: '品牌',
      children: [{ id: 'brand-chilren', name: '品牌推荐' }]
    })

    const store = useStore()
    const menuList = computed(() {
      const list = store.state.category.list.map(item => {
        return {
          id: item.id,
          name: item.name,
          // 防止初始化没有children的时候调用slice函数报错
          children: item.children && item.children.slice(0, 2)
        }
      })
      list.push(brand)
      return list
    })
    return { menuList }
  }
}
</script>

<style scoped lang='less'>
.home-category {
  width: 250px;
  height: 500px;
  background: rgba(0,0,0,0.8);
  position: relative;
  z-index: 99;
  .menu {
    li {
      padding-left: 40px;
      height: 50px;
      line-height: 50px;
      &:hover {
        background: @xtxColor;
      }
      a {
        margin-right: 4px;
        color: #fff;
        &:first-child {
          font-size: 16px;
        }
      }
    }
  }
}
</style>
# 13-首页主体-左侧分类-弹层展示
目的: 实现首页主体内容-左侧分类-鼠标进入弹出
大致步骤:
- 准备布局
- 得到数据
- 鼠标经过记录ID
- 通过ID得到分类推荐商品,使用计算属性
- 完成渲染
落地代码:
- 准备布局:
src/views/home/components/home-category.vue
    <!-- 弹层 -->
    <div class="layer">
      <h4>分类推荐 <small>根据您的购买或浏览记录推荐</small></h4>
      <ul>
        <li v-for="i in 9" :key="i">
          <RouterLink to="/">
            <img src="https://yanxuan-item.nosdn.127.net/5a115da8f2f6489d8c71925de69fe7b8.png" alt="">
            <div class="info">
              <p class="name ellipsis-2">【定金购】严选零食大礼包(12件)</p>
              <p class="desc ellipsis">超值组合装,满足馋嘴欲</p>
              <p class="price"><i>¥</i>100.00</p>
            </div>
          </RouterLink>
        </li>
      </ul>
    </div>
  .layer {
    width: 990px;
    height: 500px;
    background: rgba(255,255,255,0.8);
    position: absolute;
    left: 250px;
    top: 0;
    display: none;
    padding: 0 15px;
    h4 {
      font-size: 20px;
      font-weight: normal;
      line-height: 80px;
      small {
        font-size: 16px;
        color: #666;
      }
    }
    ul {
      display: flex;
      flex-wrap: wrap;
      li {
        width: 310px;
        height: 120px;
        margin-right: 15px;
        margin-bottom: 15px;
        border: 1px solid #eee;
        border-radius: 4px;
        background: #fff;
        &:nth-child(3n) {
          margin-right: 0;
        }
        a {
          display: flex;
          width: 100%;
          height: 100%;
          align-items: center;
          padding: 10px;
          &:hover {
            background: #e3f9f4;
          }
          img {
              width: 95px;
              height: 95px;
          }
          .info {
            padding-left: 10px;
            line-height: 24px;
		    width: 190px;
            .name {
              font-size: 16px;
              color: #666;
            }
            .desc {
              color: #999;
            }
            .price {
              font-size: 22px;
              color: @priceColor;
              i {
                font-size: 16px;
              }
            }
          }
        }
      }
    }
  }
  &:hover {
    .layer {
      display: block;
    }
  }
- 渲染逻辑:
src/views/home/components/home-category.vue
- 定义一个数据记录当前鼠标经过分类的ID,使用计算属性得到当前的分类推荐商品数据
    <ul class="menu">
+      <li v-for="item in menuList" :key="item.id" @mouseenter="categoryId=item.id">
import { useStore } from 'vuex'
import { reactive, computed, ref } from 'vue'
export default {
  name: 'HomeCategory',
  setup () {
  	// 组织所有数据逻辑
  	// 1. 获取vuex的一级分类,并且只需要两个二级分类
  	// 2. 需要在组件内部,定义一个品牌数据
  	// 3. 根据vuex的分类数据和组件中定义品牌数据,得到左侧分类完整数据(9分类+1品牌)数组
  	// 4. 进行渲染即可
    const brand = reactive({
      id: 'brand',
      name: '品牌',
      children: [{ id: 'brand-chilren', name: '品牌推荐' }]
    })
    const store = useStore()
    const menuList = computed(() {
      const list = store.state.category.list.map(item => {
        return {
          id: item.id,
          name: item.name,
          // 防止初始化没有children的时候调用slice函数报错
          children: item.children && item.children.slice(0, 2),
+          goods: item.goods
        }
      })
      list.push(brand)
      return list
    })
+    // 获取当前分类逻辑
+    const categoryId = ref(null)
+    const currCategory = computed(()=>{
+      return menuList.value.find(item => item.id === category.value)
+    })
+    return { menuList, categoryId, currCategory }
  }
}
- 渲染模版
    <!-- 弹层 -->
    <div class="layer">
      <h4>分类推荐 <small>根据您的购买或浏览记录推荐</small></h4>
      <ul v-if="currCategory && currCategory.goods && currCategory.goods.length">
        <li v-for="item in currCategory.goods" :key="item.id">
          <RouterLink to="/">
            <img :src="item.picture" alt="">
            <div class="info">
              <p class="name ellipsis-2">{{item.name}}</p>
              <p class="desc ellipsis">{{item.desc}}</p>
              <p class="price"><i>¥</i>{{item.price}}</p>
            </div>
          </RouterLink>
        </li>
      </ul>
    </div>
# 14-首页主体-左侧分类-处理品牌
目的: 品牌展示特殊,需要额外获取数据和额外的布局。
大致步骤:
- 定义API接口,在
home-category.vue组件获取数据。 - 完成基础布局,根据数据进行渲染。
- 处理左侧分类激活显示。
落地代码:
- 定义API接口,在
home-category.vue组件获取数据。
src/api/home.js
export const findBrand = (limit) => {
  return request('/home/brand', 'get', {limit})
}
src/views/home/components/home-category.vue
    const brand = reactive({
      id: 'brand',
      name: '品牌',
      children: [{ id: 'brand-children', name: '品牌推荐' }],
+      brands: []
    })
+import { findBrand } from '@/api/home.js'
// ... 省略代码
setup () {
    // ... 省略代码
+    findBrand().then(data=>{
+        brand.brands = data.result
+    })
    return { menuList, categoryId, currCategory }
}
- 进行渲染:
src/views/home/components/home-category.vue
- 布局样式
<ul>
  <li class="brand" v-for="i in 6" :key="i">
    <RouterLink to="/">
      <img src="http://zhoushugang.gitee.io/erabbit-client-pc-static/uploads/brand_goods_1.jpg" alt="">
      <div class="info">
        <p class="place"><i class="iconfont icon-dingwei"></i>北京</p>
        <p class="name ellipsis">DW</p>
        <p class="desc ellipsis-2">DW品牌闪购</p>
      </div>
    </RouterLink>
  </li>
</ul>
      li.brand {
        height: 180px;
        a {
          align-items: flex-start;
          img {
            width: 120px;
            height: 160px;
          }
          .info {
            p {
              margin-top: 8px;
            }
            .place {
              color: #999;
            }
          }
        }
      }
- 进行渲染
    <!-- 弹层 -->
    <div class="layer">
+      <h4 v-if="currCategory">{{currCategory.id==='brand'?'品牌':'分类'}}推荐 <small>根据您的购买或浏览记录推荐</small></h4>
      <ul v-if="currCategory && currCategory.goods && currCategory.goods.length">
        <li v-for="item in currCategory.goods" :key="item.id">
          <RouterLink to="/">
            <img :src="item.picture" alt="">
            <div class="info">
              <p class="name ellipsis-2">{{item.name}}</p>
              <p class="desc ellipsis">{{item.desc}}</p>
              <p class="price"><i>¥</i>{{item.price}}</p>
            </div>
          </RouterLink>
        </li>
      </ul>
+      <ul v-if="currCategory && currCategory.brands && currCategory.brands.length">
+        <li class="brand" v-for="item in currCategory.brands" :key="item.id">
+          <RouterLink to="/">
+            <img :src="item.picture" alt="">
+            <div class="info">
+              <p class="place"><i class="iconfont icon-dingwei"></i>{{item.place}}</p>
+              <p class="name ellipsis">{{item.name}}</p>
+              <p class="desc ellipsis-2">{{item.desc}}</p>
+            </div>
+          </RouterLink>
+        </li>
+      </ul>
    </div>
- 处理左侧分类激活显示
src/views/home/components/home-category.vue
- 激活类active
  .menu {
    li {
      padding-left: 40px;
      height: 50px;
      line-height: 50px;
+      &:hover,&.active {
        background: @xtxColor;
      }
- 绑定类
   <ul class="menu">
+      <li :class="{active:categoryId===item.id}"
- 移除类
+  <div class='home-category' @mouseleave="categoryId=null">
    <ul class="menu">
总结: 品牌数据需要请求后台,再汇总到所有数据中,然后渲染,然后激活当前的分类。
# 15-首页主体-左侧分类-骨架效果
目的: 为了在加载的过程中等待效果更好,封装一个骨架屏组件。
大致步骤:
- 需要一个组件,做占位使用。这个占位组件有个专业术语:骨架屏组件。
- 暴露一些属性:高,宽,背景,是否有闪动画。
- 这是一个公用组件,需要全局注册,将来这样的组件建议再vue插件中定义。
- 使用组件完成左侧分类骨架效果。
落的代码:
- 封装组件:
src/components/library/xtx-skeleton.vue
<template>
  <div class="xtx-skeleton" :style="{width,height}" :class="{shan:animated}">
    <!-- 1 盒子-->
    <div class="block" :style="{backgroundColor:bg}"></div>
    <!-- 2 闪效果 xtx-skeleton 伪元素 --->
  </div>
</template>
<script>
export default {
  name: 'XtxSkeleton',
  // 使用的时候需要动态设置 高度,宽度,背景颜色,是否闪下
  props: {
    bg: {
      type: String,
      default: '#efefef'
    },
    width: {
      type: String,
      default: '100px'
    },
    height: {
      type: String,
      default: '100px'
    },
    animated: {
      type: Boolean,
      default: false
    }
  }
}
</script>
<style scoped lang="less">
.xtx-skeleton {
  display: inline-block;
  position: relative;
  overflow: hidden;
  vertical-align: middle;
  .block {
    width: 100%;
    height: 100%;
    border-radius: 2px;
  }
}
.shan {
  &::after {
    content: "";
    position: absolute;
    animation: shan 1.5s ease 0s infinite;
    top: 0;
    width: 50%;
    height: 100%;
    background: linear-gradient(
      to left,
      rgba(255, 255, 255, 0) 0,
      rgba(255, 255, 255, 0.3) 50%,
      rgba(255, 255, 255, 0) 100%
    );
    transform: skewX(-45deg);
  }
}
@keyframes shan {
  0% {
    left: -100%;
  }
  100% {
    left: 120%;
  }
}
</style>
- 封装插件:插件定义
src/componets/library/index.js使用插件src/main.js
// 扩展vue原有的功能:全局组件,自定义指令,挂载原型方法,注意:没有全局过滤器。
// 这就是插件
// vue2.0插件写法要素:导出一个对象,有install函数,默认传入了Vue构造函数,Vue基础之上扩展
// vue3.0插件写法要素:导出一个对象,有install函数,默认传入了app应用实例,app基础之上扩展

import XtxSkeleton from './xtx-skeleton.vue'

export default {
  install (app) {
    // 在app上进行扩展,app提供 component directive 函数
    // 如果要挂载原型 app.config.globalProperties 方式
    app.component(XtxSkeleton.name, XtxSkeleton)
  }
}
import { createApp } from 'vue'
import App from './App.vue'
import router from './router'
import store from './store'
import './mock'
+import ui from './components/library'

import 'normalize.css'
import '@/assets/styles/common.less'
+// 插件的使用,在main.js使用app.use(插件)
+createApp(App).use(store).use(router).use(ui).mount('#app')
- 最后使用组件完成左侧分类骨架效果:
src/views/home/components/home-category.vue
    <ul class="menu">
      <li :class="{active:categoryId===item.id}" v-for="item in menuList" :key="item.id" @mouseenter="categoryId=item.id">
        <RouterLink to="/">{{item.name}}</RouterLink>
        <template v-if="item.children">
          <RouterLink to="/" v-for="sub in item.children" :key="sub.id">{{sub.name}}</RouterLink>
        </template>
+        <span v-else>
+          <XtxSkeleton width="60px" height="18px" style="margin-right:5px" bg="rgba(255,255,255,0.2)" />
+          <XtxSkeleton width="50px" height="18px" bg="rgba(255,255,255,0.2)" />
+        </span>
      </li>
    </ul>
.xtx-skeleton {
  animation: fade 1s linear infinite alternate;
}
@keyframes fade {
  from {
    opacity: 0.2;
  }
  to {
    opacity: 1;
  }
}
# 16-首页主体-轮播图-基础布局
目的: 封装小兔鲜轮播图组件,第一步:基础结构的使用。
大致步骤:
- 准备xtx-carousel组件基础布局,全局注册
- 准备home-banner组件,使用xtx-carousel组件,再首页注册使用。
- 深度作用xtx-carousel组件的默认样式
落的代码:
- 轮播图基础结构
src/components/library/xtx-carousel.vue
<template>
  <div class='xtx-carousel'>
    <ul class="carousel-body">
      <li class="carousel-item fade">
        <RouterLink to="/">
          <img src="http://yjy-xiaotuxian-dev.oss-cn-beijing.aliyuncs.com/picture/2021-04-15/1ba86bcc-ae71-42a3-bc3e-37b662f7f07e.jpg" alt="">
        </RouterLink>
      </li>
    </ul>
    <a href="javascript:;" class="carousel-btn prev"><i class="iconfont icon-angle-left"></i></a>
    <a href="javascript:;" class="carousel-btn next"><i class="iconfont icon-angle-right"></i></a>
    <div class="carousel-indicator">
      <span v-for="i in 5" :key="i"></span>
    </div>
  </div>
</template>

<script>
export default {
  name: 'XtxCarousel'
}
</script>
<style scoped lang="less">
.xtx-carousel{
  width: 100%;
  height: 100%;
  min-width: 300px;
  min-height: 150px;
  position: relative;
  .carousel{
    &-body {
      width: 100%;
      height: 100%;
    }
    &-item {
      width: 100%;
      height: 100%;
      position: absolute;
      left: 0;
      top: 0;
      opacity: 0;
      transition: opacity 0.5s linear;
      &.fade {
        opacity: 1;
        z-index: 1;
      }
      img {
        width: 100%;
        height: 100%;
      }
    }
    &-indicator {
      position: absolute;
      left: 0;
      bottom: 20px;
      z-index: 2;
      width: 100%;
      text-align: center;
      span {
        display: inline-block;
        width: 12px;
        height: 12px;
        background: rgba(0,0,0,0.2);
        border-radius: 50%;
        cursor: pointer;
        ~ span {
          margin-left: 12px;
        }
        &.active {
          background:  #fff;
        }
      }
    }
    &-btn {
      width: 44px;
      height: 44px;
      background: rgba(0,0,0,.2);
      color: #fff;
      border-radius: 50%;
      position: absolute;
      top: 228px;
      z-index: 2;
      text-align: center;
      line-height: 44px;
      opacity: 0;
      transition: all 0.5s;
      &.prev{
        left: 20px;
      }
      &.next{
        right: 20px;
      }
    }
  }
  &:hover {
    .carousel-btn {
      opacity: 1;
    }
  }
}
</style>
- 全局注册轮播图
src/components/library/index.js
import XtxSkeleton from './xtx-skeleton.vue'
+import XtxCarousel from './xtx-carousel.vue'

export default {
  install (app) {
    app.component(XtxSkeleton.name, XtxSkeleton)
+    app.component(XtxCarousel.name, XtxCarousel)
  }
}
- 首页广告组件基础结构
src/views/home/components/home-banner.vue
<template>
  <div class="home-banner">
    <XtxCarousel />
  </div>
</template>
<script>
export default {
  name: 'HomeBanner'
}
</script>
<style scoped lang="less">
.home-banner {
  width: 1240px;
  height: 500px;
  position: absolute;
  left: 0;
  top: 0;
  z-index: 98
}
</style>
- 首页使用广告组件
<template>
+  <!-- 首页入口 -->
+  <div class="home-entry">
+    <div class="container">
      <!-- 左侧分类 -->
      <HomeCategory />
      <!-- 轮播图 -->
      <HomeBanner />
    </div>
  </div>
</template>
<script>
import HomeCategory from './components/home-category'
+import HomeBanner from './components/home-banner'
export default {
  name: 'HomePage',
  components: {
+    HomeCategory,
    HomeBanner
  }
}
</script>
<style scoped lang="less"></style>
- 覆盖轮播图组件样式
src/views/home/components/home-banner.vue
.xtx-carousel {
  ::v-deep .carousel-btn.prev {
    left: 270px;
  }
  ::v-deep .carousel-indicator {
    padding-left: 250px;
  }
}
总结: 需要注意要覆盖样式,首页轮播图特殊些。
# 17-首页主体-轮播图-渲染结构
目的: 封装小兔鲜轮播图组件,第二步:动态渲染结构。
大致步骤:
- 定义获取广告图API函数
- 在home-banner组件获取轮播图数据,传递给xtx-carousel组件
- 在xtx-carousel组件完成渲染
落的代码:
- API函数
src/api/home.js
/**
 * 获取广告图
 * @returns Promise
 */
export const findBanner = () => {
  return request('/home/banner', 'get')
}
- 广告组件获取数据,传给轮播图
src/views/home/components/home-banner.vue
<template>
  <div class="home-banner">
+    <XtxCarousel :sliders="sliders" />
  </div>
</template>
<script>
import { ref } from 'vue'
import { findBanner } from '@/api/home'
export default {
  name: 'HomeBanner',
+  setup () {
+    const sliders = ref([])
+    findBanner().then(data => {
+      sliders.value = data.result
+    })
+    return { sliders }
+  }
}
</script>
- 完成轮播图结构渲染
src/components/library/xtx-carousel.vue
<template>
  <div class='xtx-carousel'>
    <ul class="carousel-body">
+      <li class="carousel-item" v-for="(item,i) in sliders" :key="i" :class="{fade:index===i}">
        <RouterLink to="/">
+          <img :src="item.imgUrl" alt="">
        </RouterLink>
      </li>
    </ul>
    <a href="javascript:;" class="carousel-btn prev"><i class="iconfont icon-angle-left"></i></a>
    <a href="javascript:;" class="carousel-btn next"><i class="iconfont icon-angle-right"></i></a>
    <div class="carousel-indicator">
+      <span v-for="(item,i) in sliders" :key="i" :class="{active:index===i}"></span>
    </div>
  </div>
</template>

<script>
+import { ref } from 'vue'
export default {
  name: 'XtxCarousel',
+  props: {
+    sliders: {
+      type: Array,
+      default: () => []
+    }
+  },
+  setup () {
+    // 默认显示的图片的索引
+    const index = ref(0)
+    return { index }
+  }
}
</script>
总结: fade是控制显示那张图片的,需要一个默认索引数据,渲染第一张图和激活第一个点。
# 18-首页主体-轮播图-逻辑封装
目的: 封装小兔鲜轮播图组件,第三步:逻辑功能实现。
大致步骤:
- 自动播放,暴露自动轮播属性,设置了就自动轮播
- 如果有自动播放,鼠标进入离开,暂停,开启
- 指示器切换,上一张,下一张
- 销毁组件,清理定时器
落地代码: src/components/library/xtx-carousel.vue
- 自动轮播实现
+import { ref, watch } from 'vue'
export default {
  name: 'XtxCarousel',
  props: {
    sliders: {
      type: Array,
      default: () => []
    },
+    duration: {
+      type: Number,
+      default: 3000
+    },
+    autoPlay: {
+      type: Boolean,
+      default: false
+    }
  },
  setup (props) {
    // 默认显示的图片的索引
    const index = ref(0)
+    // 自动播放
+    let timer = null
+    const autoPlayFn = () => {
+      clearInterval(timer)
+      timer = setInterval(() => {
+        index.value++
+        if (index.value >= props.sliders.length) {
+          index.value = 0
+        }
+      }, props.duration)
+    }
+    watch(() => props.sliders, (newVal) => {
+      // 有数据&开启自动播放,才调用自动播放函数
+      if (newVal.length && props.autoPlay) {
+        index.value = 0
+        autoPlayFn()
+      }
+    }, { immediate: true })
+
    return { index }
  }
}
- 如果有自动播放,鼠标进入离开,暂停,开启
    // 鼠标进入停止,移出开启自动,前提条件:autoPlay为true
    const stop = () => {
      if (timer) clearInterval(timer)
    }
    const start = () => {
      if (props.sliders.length && props.autoPlay) {
        autoPlayFn()
      }
    }

    return { index, stop, start }
+ <div class='xtx-carousel' @mouseenter="stop()" @mouseleave="start()">
使用需要加 auto-play <XtxCarousel auto-play :sliders="sliders" />
- 指示器切换,上一张,下一张
    // 上一张下一张
    const toggle = (step) => {
      const newIndex = index.value + step
      if (newIndex >= props.sliders.length) {
        index.value = 0
        return
      }
      if (newIndex < 0) {
        index.value = props.sliders.length - 1
        return
      }
      index.value = newIndex
    }

    return { index, stop, start, toggle }
- 销毁组件,清理定时器
    // 组件消耗,清理定时器
    onUnmounted(() => {
      clearInterval(timer)
    })
总结: 按照思路步骤,一步步实现即可。
# 19-首页主体-面板封装
目的: 提取首页的公用面板进行复用
大致思路:
- 头部
- 标题和副标题由props传入
- 右侧内容由插槽传入
- 查看更多使用次数多封装成全局组件
- 主体
- 全部由插槽传入

实现步骤:
- 查看更多全局组件实现
src/components/library/xtx-more.vue 定义
<template>
  <RouterLink :to="path" class="xtx-more">
    <span>查看全部</span>
    <i class="iconfont icon-angle-right"></i>
  </RouterLink>
</template>

<script>
export default {
  name: 'XtxMore',
  props: {
    path: {
      type: String,
      default: '/'
    }
  }
}
</script>

<style scoped lang='less'>
.xtx-more {
  margin-bottom: 2px;
  span {
    font-size: 16px;
    vertical-align: middle;
    margin-right: 4px;
    color: #999;
  }
  i {
    font-size: 14px;
    vertical-align: middle;
    position: relative;
    top: 2px;
    color: #ccc;
  }
  &:hover {
    span,i {
      color: @xtxColor;
    }
  }
}
</style>
src/components/library/index.js 注册
import XtxSkeleton from './xtx-skeleton.vue'
import XtxCarousel from './xtx-carousel.vue'
+import XtxMore from './xtx-more.vue'

export default {
  install (app) {
    app.component(XtxSkeleton.name, XtxSkeleton)
    app.component(XtxCarousel.name, XtxCarousel)
+    app.component(XtxMore.name, XtxMore)
  }
}
- 定义首页需要的面板组件
<template>
  <div class="home-panel">
    <div class="container">
      <div class="head">
        <h3>{{ title }}<small>{{ subTitle }}</small></h3>
        <slot name="right" />
      </div>
      <slot />
    </div>
  </div>
</template>

<script>
export default {
  name: 'HomePanel',
  props: {
    title: {
      type: String,
      default: ''
    },
    subTitle: {
      type: String,
      default: ''
    }
  }
}
</script>

<style scoped lang='less'>
.home-panel {
  background-color: #fff;
  .head {
    padding: 40px 0;
    display: flex;
    align-items: flex-end;
    h3 {
      flex: 1;
      font-size: 32px;
      font-weight: normal;
      margin-left: 6px;
      height: 35px;
      line-height: 35px;
      small {
        font-size: 16px;
        color: #999;
        margin-left: 20px;
      }
    }
  }
}
</style>
# 20-首页主体-新鲜好物
目的: 使用面板组件完成新鲜好物模块。
大致步骤:
- 封装API调用接口
- 进行组件基础布局
- 调用接口渲染组件
落地代码:
src/api/home.js
export const findNew = () => {
  return request('home/new', 'get')
}
<template>
<div class="home-new">
<HomePanel title="新鲜好物" sub-title="新鲜出炉 品质靠谱">
<template #right><XtxMore path="/" /></template>
<!-- 面板内容 -->
<ul class="goods-list">
<li v-for="item in goods" :key="item.id">
<RouterLink :to="`/product/${item.id}`">
<img :src="item.picture" alt="">
<p class="name ellipsis">{{item.name}}</p>
<p class="price">¥{{item.price}}</p>
</RouterLink>
</li>
</ul>
</HomePanel>
</div>
</template>
<script>
import { ref } from 'vue'
import HomePanel from './home-panel'
import { findNew } from '@/api/home'
export default {
name: 'HomeNew',
components: { HomePanel },
setup () {
const goods = ref([])
findNew().then(data => {
goods.value = data.result
})
return { goods }
}
}
</script>
<style scoped lang="less">
.goods-list {
display: flex;
justify-content: space-between;
height: 406px;
li {
width: 306px;
height: 406px;
background: #f0f9f4;
.hoverShadow();
img {
width: 306px;
height: 306px;
}
p {
font-size: 22px;
padding: 12px 30px 0 30px;
text-align: center;
}
.price {
color: @priceColor;
}
}
}
</style>
src/views/home/index.vue
    <!-- 新鲜好物 -->
+    <HomeNew />
  </div>
</template>

<script>
import HomeCategory from './components/home-category'
import HomeBanner from './components/home-banner'
+import HomeNew from './components/home-new'
export default {
  name: 'xtx-home-page',
+  components: { HomeCategory, HomeBanner, HomeNew }
}
</script>
总结: vue3.0中 只支持v-slot指令,所以需要配合template来使用。
# 21-首页主体-人气推荐
目的: 完成人气推荐模块
大致步骤:
- 定义API函数
- 定义组件且完成渲染
- 在首页组件中导入使用
落地代码:
src/api/home.js
export const findHot = () => {
  return request('home/hot', 'get')
}
src/views/home/components/home-hot.vue
<template>
  <HomePanel title="人气推荐" sub-title="人气爆款 不容错过">
    <ul ref="pannel" class="goods-list">
      <li v-for="item in goods" :key="item.id">
        <RouterLink to="/">
          <img :src="item.picture" alt="">
          <p class="name">{{item.title}}</p>
          <p class="desc">{{item.alt}}</p>
        </RouterLink>
      </li>
    </ul>
  </HomePanel>
</template>

<script>
import { ref } from 'vue'
import HomePanel from './home-panel'
import { findHot } from '@/api/home'
export default {
  name: 'HomeNew',
  components: { HomePanel },
  setup () {
    const goods = ref([])
    findHot().then(data => {
      goods.value = data.result
    })
    return { goods }
  }
}
</script>

<style scoped lang='less'>
.goods-list {
  display: flex;
  justify-content: space-between;
  height: 426px;
  li {
    width: 306px;
    height: 406px;
    .hoverShadow();
    img {
      width: 306px;
      height: 306px;
    }
    p {
      font-size: 22px;
      padding-top: 12px;
      text-align: center;
    }
    .desc {
      color: #999;
      font-size: 18px;
    }
  }
}
</style>
src/views/home/index.vue
    <!-- 新鲜好物 -->
    <HomeNew />
    <!-- 人气推荐 -->
+    <HomeHot />
  </div>
</template>

<script>
import HomeCategory from './components/home-category'
import HomeBanner from './components/home-banner'
import HomeNew from './components/home-new'
+import HomeHot from './components/home-hot'
export default {
  name: 'xtx-home-page',
+  components: { HomeCategory, HomeBanner, HomeNew, HomeHot }
}
</script>
# 22-首页主体-补充-vue动画
目标: 知道vue中如何使用动画,知道Transition组件使用。
当vue中,显示隐藏,创建移除,一个元素或者一个组件的时候,可以通过transition实现动画。

如果元素或组件离开,完成一个淡出效果:
<transition name="fade">
  <p v-if="show">100</p>
</transition>
.fade-leave {
    opacity: 1
}
.fade-leave-active {
    transition: all 1s;
}
.fade-leave-to {
    opcaity: 0
}
- 进入(显示,创建)
- v-enter 进入前 (vue3.0 v-enter-from)
- v-enter-active 进入中
- v-enter-to 进入后
- 离开(隐藏,移除)
- v-leave 进入前 (vue3.0 v-leave-from)
- v-leave-active 进入中
- v-leave-to 进入后
多个transition使用不同动画,可以添加nam属性,name属性的值替换v即可。
# 23-首页主体-面板骨架效果
目的: 加上面板的骨架加载效果
定义一个骨架布局组件:
src/views/home/components/home-skeleton.vue
<template>
  <div class='home-skeleton'>
    <div class="item" v-for="i in 4" :key="i" :style="{backgroundColor:bg}">
      <XtxSkeleton bg="#e4e4e4" width="306px" height="306px" animated />
      <XtxSkeleton bg="#e4e4e4" width="160px" height="24px" animated />
      <XtxSkeleton bg="#e4e4e4" width="120px" height="24px" animated />
    </div>
  </div>
</template>

<script>
export default {
  name: 'HomeSkeleton',
  props: {
    bg: {
      type: String,
      default: '#fff'
    }
  }
}
</script>

<style scoped lang='less'>
.home-skeleton {
  width: 1240px;
  height: 406px;
  display: flex;
  justify-content: space-between;
  .item {
    width: 306px;
    .xtx-skeleton ~ .xtx-skeleton{
      display: block;
      margin: 16px auto 0;
    }
  }
}
</style>
在 home-hot home-new 组件分别使用
  <HomePanel title="人气推荐" sub-title="人气爆款 不容错过">
+    <div style="position: relative;height: 426px;">
+      <Transition name="fade">
+        <ul v-if="goods.length" ref="pannel" class="goods-list">
          <li v-for="item in goods" :key="item.id">
            <RouterLink to="/">
              <img :src="item.picture" alt="">
              <p class="name">{{item.title}}</p>
              <p class="desc">{{item.alt}}</p>
            </RouterLink>
          </li>
        </ul>
+         <HomeSkeleton v-else />
+      </Transition>
+    </div>
  </HomePanel>
<template>
<HomePanel title="新鲜好物" sub-title="新鲜出炉 品质靠谱">
<template v-slot:right><XtxMore /></template>
+ <div style="position: relative;height: 406px;">
+ <Transition name="fade">
+ <ul v-if="goods.length" ref="pannel" class="goods-list">
<li v-for="item in goods" :key="item.id">
<RouterLink to="/">
<img :src="item.picture" alt="">
<p class="name">{{item.name}}</p>
<p class="price">¥{{item.price}}</p>
</RouterLink>
</li>
</ul>
+ <HomeSkeleton bg="#f0f9f4" v-else />
+ </Transition>
+ </div>
</HomePanel>
</template>
在 src/assets/styles/common.less 定义动画
.fade{
  &-leave {
    &-active {
      position: absolute;
      width: 100%;
      transition: opacity .5s .2s;
      z-index: 1;
    }
    &-to {
      opacity: 0;
    }
  }
}
注意:
- 动画的父容器需要是定位,防止定位跑偏。
# 24-首页主体-组件数据懒加载
目的: 实现当组件进入可视区域在加载数据。
我们可以使用 @vueuse/core 中的 useIntersectionObserver 来实现监听进入可视区域行为,但是必须配合vue3.0的组合API的方式才能实现。
大致步骤:
- 理解
useIntersectionObserver的使用,各个参数的含义 - 改造 home-new 组件成为数据懒加载,掌握
useIntersectionObserver函数的用法 - 封装
useLazyData函数,作为数据懒加载公用函数 - 把
home-new和home-hot改造成懒加载方式
落的代码:
- 先分析下这个
useIntersectionObserver函数:
// stop 是停止观察是否进入或移出可视区域的行为
const { stop } = useIntersectionObserver(
  // target 是观察的目标dom容器,必须是dom容器,而且是vue3.0方式绑定的dom对象
  target,
  // isIntersecting 是否进入可视区域,true是进入 false是移出
  // observerElement 被观察的dom
  ([{ isIntersecting }], observerElement) => {
    // 在此处可根据isIntersecting来判断,然后做业务
  },
)
- 开始改造
home-new组件:rc/views/home/components/home-new.vue
- 进入可视区后获取数据
<div ref="box" style="position: relative;height: 406px;">
// 省略。。。
<script>
import HomePanel from './home-panel'
import HomeSkeleton from './home-skeleton'
import { findNew } from '@/api/home'
import { ref } from 'vue'
import { useIntersectionObserver } from '@vueuse/core'
export default {
  name: 'HomeNew',
  components: { HomePanel, HomeSkeleton },
  setup () {
    const goods = ref([])
    const box = ref(null)
    const { stop } = useIntersectionObserver(
      box,
      ([{ isIntersecting }]) => {
        if (isIntersecting) {
          stop()
          findNew().then(data => {
            goods.value = data.result
          })
        }
      }
    )
    return { goods, box }
  }
}
</script>
- 由于首页面板数据加载都需要实现懒数据加载,所以封装一个钩子函数,得到数据。
src/hooks/index.js
// hooks 封装逻辑,提供响应式数据。
import { useIntersectionObserver } from '@vueuse/core'
import { ref } from 'vue'
// 数据懒加载函数
export const useLazyData = (apiFn) => {
  // 需要
  // 1. 被观察的对象
  // 2. 不同的API函数
  const target = ref(null)
  const result = ref([])
  const { stop } = useIntersectionObserver(
    target,
    ([{ isIntersecting }], observerElement) => {
      if (isIntersecting) {
        stop()
        // 调用API获取数据
        apiFn().then(data => {
          result.value = data.result
        })
      }
    }
  )
  // 返回--->数据(dom,后台数据)
  return { target, result }
}
- 再次改造
home-new组件:rc/views/home/components/home-new.vue
import { findNew } from '@/api/home'
+import { useLazyData } from '@/hooks'
export default {
  name: 'HomeNew',
  components: { HomePanel, HomeSkeleton },
  setup () {
+    const { target, result } = useLazyData(findNew)
+    return { goods: result, target }
  }
}
+ <div ref="target" style="position: relative;height: 426px;">
- 然后改造
home-hot组件:src/views/home/components/home-hot.vue
+ <div ref="target" style="position: relative;height: 426px;">
import { findHot } from '@/api/home'
import HomePanel from './home-panel'
import HomeSkeleton from './home-skeleton'
+import { useLazyData } from '@/hooks'
export default {
  name: 'HomeHot',
  components: { HomePanel, HomeSkeleton },
  setup () {
+    const { target, result } = useLazyData(findHot)
+    return { target, list: result }
  }
}
# 25-首页主体-热门品牌
目的: 实现品牌的展示,和切换品牌效果。
基本步骤:
- 准备基础布局组件
- 获取数据实现渲染,完成切换效果
- 加上骨架效果和数据懒加载
落的代码:
- 基础结构:
src/views/home/components/home-brand.vue
<template>
  <HomePanel title="热门品牌" sub-title="国际经典 品质保证">
    <template v-slot:right>
      <a href="javascript:;" class="iconfont icon-angle-left prev"></a>
      <a href="javascript:;" class="iconfont icon-angle-right next"></a>
    </template>
    <div class="box" ref="box">
      <ul class="list" >
        <li v-for="i in 10" :key="i">
          <RouterLink to="/">
            <img src="http://zhoushugang.gitee.io/erabbit-client-pc-static/uploads/brand_goods_1.jpg" alt="">
          </RouterLink>
        </li>
      </ul>
    </div>
  </HomePanel>
</template>

<script>
import HomePanel from './home-panel'
export default {
  name: 'HomeBrand',
  components: { HomePanel }
}
</script>

<style scoped lang='less'>
.home-panel {
  background:#f5f5f5
}
.iconfont {
  width: 20px;
  height: 20px;
  background: #ccc;
  color: #fff;
  display: inline-block;
  text-align: center;
  margin-left: 5px;
  background: @xtxColor;
  &::before {
    font-size: 12px;
    position: relative;
    top: -2px
  }
  &.disabled {
    background: #ccc;
    cursor: not-allowed;
  }
}
.box {
  display: flex;
  width: 100%;
  height: 345px;
  overflow: hidden;
  padding-bottom: 40px;
  .list {
    width: 200%;
    display: flex;
    transition: all 1s;
    li {
      margin-right: 10px;
      width: 240px;
      &:nth-child(5n) {
        margin-right: 0;
      }
      img {
        width: 240px;
        height: 305px;
      }
    }
  }
}
</style>
- 使用组件:
src/views/home/index.vue
    <!-- 人气推荐 -->
    <HomeHot />
    <!-- 热门品牌 -->
+    <HomeBrand />
+import HomeBrand from './components/home-brand'
export default {
  name: 'xtx-home-page',
+  components: { HomeCategory, HomeBanner, HomeNew, HomeHot, HomeBrand }
}
- 获取数据和切换效果:
- 由于最后会使用到数据懒加载,那么我们也会使用组合API实现。
- 业务上,只有两页数据切换,0--->1 或者 1--->0 的方式。
<template>
  <HomePanel title="热门品牌" sub-title="国际经典 品质保证">
    <template v-slot:right>
      <a @click="toggle(-1)" :class="{disabled:index===0}" href="javascript:;" class="iconfont icon-angle-left prev"></a>
      <a @click="toggle(1)" :class="{disabled:index===1}" href="javascript:;" class="iconfont icon-angle-right next"></a>
    </template>
    <div class="box">
        <ul v-if="brands.length" class="list" :style="{transform:`translateX(${-index*1240}px)`}">
          <li v-for="item in brands" :key="item.id">
            <RouterLink to="/">
              <img :src="item.picture" alt="">
            </RouterLink>
          </li>
        </ul>
    </div>
  </HomePanel>
</template>

<script>
import { ref } from 'vue'
import HomePanel from './home-panel'
import { findBrand } from '@/api/home'
import { useLazyData } from '@/hooks'
export default {
  name: 'HomeBrand',
  components: { HomePanel },
  setup () {
    // 获取数据
     const brands = ref([])
     findBrand(10).then(data => {
       brands.value = data.result
     })

    // 切换效果,前提只有 0 1 两页
    const index = ref(0)
    // 1. 点击上一页
    // 2. 点击下一页
    const toggle = (step) => {
      const newIndex = index.value + step
      if (newIndex < 0 || newIndex > 1) return
      index.value = newIndex
    }
    return { brands, toggle, index }
  }
}
</script>
- 加上数据懒加载和骨架效果
<template>
  <HomePanel title="热门品牌" sub-title="国际经典 品质保证">
    <template v-slot:right>
      <a @click="toggle(-1)" :class="{disabled:index===0}" href="javascript:;" class="iconfont icon-angle-left prev"></a>
      <a @click="toggle(1)" :class="{disabled:index===1}" href="javascript:;" class="iconfont icon-angle-right next"></a>
    </template>
+    <div ref="target" class="box">
+      <Transition name="fade">
+        <ul v-if="brands.length" class="list" :style="{transform:`translateX(${-index*1240}px)`}">
          <li v-for="item in brands" :key="item.id">
            <RouterLink to="/">
              <img :src="item.picture" alt="">
            </RouterLink>
          </li>
        </ul>
+        <div v-else class="skeleton">
+          <XtxSkeleton class="item" v-for="i in 5" :key="i" animated bg="#e4e4e4" width="240px" height="305px"/>
+        </div>
+      </Transition>
    </div>
  </HomePanel>
</template>

<script>
import { ref } from 'vue'
import HomePanel from './home-panel'
import { findBrand } from '@/api/home'
+import { useLazyData } from '@/hooks'
export default {
  name: 'HomeBrand',
  components: { HomePanel },
  setup () {
    // 获取数据
    // const brands = ref([])
    // findBrand(10).then(data => {
    //   brands.value = data.result
    // })
+    // 注意:useLazyData需要的是API函数,如果遇到要传参的情况,自己写函数再函数中调用API
+    const { target, result } = useLazyData(() => findBrand(10))

    // 切换效果,前提只有 0 1 两页
    const index = ref(0)
    // 1. 点击上一页
    // 2. 点击下一页
    const toggle = (step) => {
      const newIndex = index.value + step
      if (newIndex < 0 || newIndex > 1) return
      index.value = newIndex
    }
+    return { brands: result, toggle, index, target }
  }
}
</script>
  .skeleton {
    width: 100%;
    display: flex;
    .item {
      margin-right: 10px;
      &:nth-child(5n) {
        margin-right: 0;
      }
    }
  }
总结: 注意下useLazyData传参的情况。
# 26-首页主体-商品区块
目的: 完成商品区域展示。
大致步骤:
- 准备一个商品盒子组件
home-goods展示单个商品 - 定义产品区块组件
home-product使用home-goods完成基础布局 - 在首页中使用
home-product组件 - 定义API函数,获取数据,进行渲染
- 处理板块需要进入可视区太多内容才能加载数据问题。
落地代码:
- 单个商品组件:
src/views/home/components/home-goods.vue
<template>
<div class="goods-item">
<RouterLink to="/" class="image">
<img src="http://zhoushugang.gitee.io/erabbit-client-pc-static/uploads/fresh_goods_1.jpg" alt="" />
</RouterLink>
<p class="name ellipsis-2">美威 智利原味三文鱼排 240g/袋 4片装</p>
<p class="desc">海鲜年货</p>
<p class="price">¥108.00</p>
<div class="extra">
<RouterLink to="/">
<span>找相似</span>
<span>发现现多宝贝 ></span>
</RouterLink>
</div>
</div>
</template>
<script>
export default {
name: 'HomeGoods'
}
</script>
<style scoped lang='less'>
.goods-item {
width: 240px;
height: 300px;
padding: 10px 30px;
position: relative;
overflow: hidden;
border: 1px solid transparent;
transition: all .5s;
.image {
display: block;
width: 160px;
height: 160px;
margin: 0 auto;
img {
width: 100%;
height: 100%;
}
}
p {
margin-top: 6px;
font-size: 16px;
&.name {
height: 44px;
}
&.desc {
color: #666;
height: 22px;
}
&.price {
margin-top: 10px;
font-size: 20px;
color: @priceColor;
}
}
.extra {
position: absolute;
left: 0;
bottom: 0;
height: 86px;
width: 100%;
background: @xtxColor;
text-align: center;
transform: translate3d(0,100%,0);
transition: all .5s;
span {
display: block;
color: #fff;
width: 120px;
margin: 0 auto;
line-height: 30px;
&:first-child {
font-size: 18px;
border-bottom:1px solid #fff;
line-height: 40px;
margin-top: 5px;
}
}
}
&:hover {
border-color: @xtxColor;
.extra {
transform: none;
}
}
}
</style>
- 产品区块组件:
src/views/home/components/home-product.vue
<template>
  <div class="home-product">
    <HomePanel title="生鲜" v-for="i in 4" :key="i">
      <template v-slot:right>
        <div class="sub">
          <RouterLink to="/">海鲜</RouterLink>
          <RouterLink to="/">水果</RouterLink>
          <RouterLink to="/">蔬菜</RouterLink>
          <RouterLink to="/">水产</RouterLink>
          <RouterLink to="/">禽肉</RouterLink>
        </div>
        <XtxMore />
      </template>
      <div class="box">
        <RouterLink class="cover" to="/">
          <img src="http://zhoushugang.gitee.io/erabbit-client-pc-static/uploads/fresh_goods_cover.jpg" alt="">
          <strong class="label">
            <span>生鲜馆</span>
            <span>全场3件7折</span>
          </strong>
        </RouterLink>
        <ul class="goods-list">
          <li v-for="i in 8" :key="i">
            <HomeGoods />
          </li>
        </ul>
      </div>
    </HomePanel>
  </div>
</template>

<script>
import HomePanel from './home-panel'
import HomeGoods from './home-goods'
export default {
  name: 'HomeProduct',
  components: { HomePanel, HomeGoods }
}
</script>

<style scoped lang='less'>
.home-product {
  background: #fff;
  height: 2900px;
  .sub {
    margin-bottom: 2px;
    a {
      padding: 2px 12px;
      font-size: 16px;
      border-radius: 4px;
      &:hover {
        background: @xtxColor;
        color: #fff;
      }
      &:last-child {
        margin-right: 80px;
      }
    }
  }
  .box {
    display: flex;
    .cover {
      width: 240px;
      height: 610px;
      margin-right: 10px;
      position: relative;
      img {
        width: 100%;
        height: 100%;
      }
      .label {
        width: 188px;
        height: 66px;
        display: flex;
        font-size: 18px;
        color: #fff;
        line-height: 66px;
        font-weight: normal;
        position: absolute;
        left: 0;
        top: 50%;
        transform: translate3d(0,-50%,0);
        span {
          text-align: center;
          &:first-child {
            width: 76px;
            background: rgba(0,0,0,.9);
          }
          &:last-child {
            flex: 1;
            background: rgba(0,0,0,.7);
          }
        }
      }
    }
    .goods-list {
      width: 990px;
      display: flex;
      flex-wrap: wrap;
      li {
        width: 240px;
        height: 300px;
        margin-right: 10px;
        margin-bottom: 10px;
        &:nth-last-child(-n+4) {
          margin-bottom: 0;
        }
        &:nth-child(4n) {
          margin-right: 0;
        }
      }
    }
  }
}
</style>
- 使用组件:
src/views/home/index.vue
    <!-- 人气推荐 -->
    <HomeHot />
    <!-- 热门品牌 -->
    <HomeBrand />
    <!-- 商品区域 -->
+    <HomeProduct />
+import HomeProduct from './components/home-product'
export default {
  name: 'xtx-home-page',
+  components: { HomeCategory, HomeBanner, HomeNew, HomeHot, HomeBrand, HomeProduct }
}
- 获取数据渲染:
- 定义API
src/api/home.js
export const findGoods = () => {
  return request('home/goods', 'get')
}
- 进行渲染
src/views/home/components/home-product.vue
<template>
  <div class="home-product" ref="target">
+    <HomePanel :title="cate.name" v-for="cate in list" :key="cate.id">
      <template v-slot:right>
        <div class="sub">
+          <RouterLink v-for="sub in cate.children" :key="sub.id" to="/">{{sub.name}}</RouterLink>
        </div>
        <XtxMore />
      </template>
      <div class="box">
        <RouterLink class="cover" to="/">
+          <img :src="cate.picture" alt="">
          <strong class="label">
+            <span>{{cate.name}}馆</span>
+            <span>{{cate.saleInfo}}</span>
          </strong>
        </RouterLink>
        <ul class="goods-list">
+          <li v-for="item in cate.goods" :key="item.id">
+            <HomeGoods :goods="item" />
          </li>
        </ul>
      </div>
    </HomePanel>
  </div>
</template>

<script>
import HomePanel from './home-panel'
import HomeGoods from './home-goods'
+import { findGoods } from '@/api/home'
+import { useLazyData } from '@/hooks'
export default {
  name: 'HomeProduct',
  components: { HomePanel, HomeGoods },
+  setup () {
+    const { target, result } = useLazyData(findGoods)
+    return { target, list: result }
+  }
}
</script>
src/views/home/components/home-goods.vue
<template>
<div class="goods-item">
<RouterLink to="/" class="image">
+ <img :src="goods.picture" alt="" />
</RouterLink>
+ <p class="name ellipsis-2">{{goods.name}}</p>
+ <p class="desc">{{goods.tag}}</p>
+ <p class="price">¥{{goods.price}}</p>
<div class="extra">
<RouterLink to="/">
<span>找相似</span>
<span>发现现多宝贝 ></span>
</RouterLink>
</div>
</div>
</template>
<script>
export default {
name: 'HomeGoods',
+ props: {
+ goods: {
+ type: Object,
+ default: () => {}
+ }
+ }
}
</script>
- 处理问题:
- 产品区域需要滚动比较多才能去加载数据。
  const { stop } = useIntersectionObserver(
    container,
    ([{ isIntersecting }], dom) => {
      if (isIntersecting) {
        stop()
        apiFn && apiFn().then(({ result }) => {
          data.value = result
        })
      }
+    }, {
+      threshold: 0
+    }
  )
- threshold 容器和可视区交叉的占比(进入的面积/容器完整面试) 取值,0-1 之间,默认比0大,所以需要滚动较多才能触发进入可视区域事件。
# 27-首页主体-最新专题
目的: 完成最新专题展示。
基础布局:src/views/home/components/home-special.vue
<template>
<HomePanel title="最新专题">
<template v-slot:right><XtxMore /></template>
<div class="special-list" ref="homeSpecial">
<div class="special-item" v-for="i in 3" :key="i">
<RouterLink to="/">
<img src="http://zhoushugang.gitee.io/erabbit-client-pc-static/uploads/topic_goods_1.jpg" alt />
<div class="meta">
<p class="title">
<span class="top ellipsis">看到撒娇的撒娇的凯撒就</span>
<span class="sub ellipsis">倒萨倒萨倒萨</span>
</p>
<span class="price">¥19.99起</span>
</div>
</RouterLink>
<div class="foot">
<span class="like"><i class="iconfont icon-hart1"></i>100</span>
<span class="view"><i class="iconfont icon-see"></i>100</span>
<span class="reply"><i class="iconfont icon-message"></i>100</span>
</div>
</div>
</div>
</HomePanel>
</template>
<script>
import HomePanel from './home-panel'
export default {
name: 'HomeSpecial',
components: { HomePanel }
}
</script>
<style scoped lang='less'>
.home-panel {
background: #f5f5f5;
}
.special-list {
height: 380px;
padding-bottom: 20px;
display: flex;
justify-content: space-between;
.special-item {
width: 404px;
background: #fff;
.hoverShadow();
a {
display: block;
width: 100%;
height: 288px;
position: relative;
img {
width: 100%;
height: 100%;
}
.meta {
background-image: linear-gradient(to top,rgba(0, 0, 0, 0.8),transparent 50%);
position: absolute;
left: 0;
top: 0;
width: 100%;
height: 288px;
.title {
position: absolute;
bottom: 0px;
left: 0;
padding-left: 16px;
width: 70%;
height: 70px;
.top {
color: #fff;
font-size: 22px;
display: block;
}
.sub {
display: block;
font-size: 19px;
color: #999;
}
}
.price {
position: absolute;
bottom: 25px;
right: 16px;
line-height: 1;
padding: 4px 8px 4px 7px;
color: @priceColor;
font-size: 17px;
background-color: #fff;
border-radius: 2px;
}
}
}
.foot {
height: 72px;
line-height: 72px;
padding: 0 20px;
font-size: 16px;
i {
display: inline-block;
width: 15px;
height: 14px;
margin-right: 5px;
color: #999;
}
.like,
.view {
float: left;
margin-right: 25px;
vertical-align: middle;
}
.reply {
float: right;
vertical-align: middle;
}
}
}
}
</style>
使用组件:src/views/home/index.vue
    <!-- 商品区域 -->
    <HomeProduct />
    <!-- 最新专题 -->
+    <HomeSpecial />
+import HomeSpecial from './components/home-special'
export default {
  name: 'xtx-home-page',
+  components: { HomeCategory, HomeBanner, HomeNew, HomeHot, HomeBrand, HomeProduct, HomeSpecial }
}
获取数据:
- 定义API
src/api/home.js
export const findSpecial = () => {
  return request('home/special', 'get')
}
- 渲染组件
src/views/home/components/home-speical.vue
<template>
<HomePanel title="最新专题">
<template v-slot:right><XtxMore /></template>
<div class="special-list" ref="homeSpecial">
+ <div class="special-item" v-for="item in list" :key="item.id">
<RouterLink to="/">
+ <img :src="item.cover" alt />
<div class="meta">
+ <p class="title">{{item.title}}<small>{{item.summary}}</small></p>
+ <span class="price">¥{{item.lowestPrice}}起</span>
</div>
</RouterLink>
<div class="foot">
+ <span class="like"><i class="iconfont icon-hart1"></i>{{item.collectNum}}</span>
+ <span class="view"><i class="iconfont icon-see"></i>{{item.viewNum}}</span>
+ <span class="reply"><i class="iconfont icon-message"></i>{{item.replyNum}}</span>
</div>
</div>
</div>
</HomePanel>
</template>
<script>
import HomePanel from './home-panel'
+import { findSpecial } from '@/api/home'
+import { useLazyData } from '@/hooks'
export default {
name: 'HomeSpecial',
components: { HomePanel },
+ setup () {
+ const { container, data } = useLazyData(findSpecial)
+ return { homeSpecial: container, list: data }
+ }
}
</script>
# 28-首页主体-图片懒加载
目的: 当图片进入可视区域内去加载图片,且处理加载失败,封装成指令。
介绍一个webAPI:IntersectionObserver (opens new window)
// 创建观察对象实例
const observer = new IntersectionObserver(callback[, options])
// callback 被观察dom进入可视区离开可视区都会触发
// - 两个回调参数 entries , observer
// - entries 被观察的元素信息对象的数组 [{元素信息},{}],信息中isIntersecting判断进入或离开
// - observer 就是观察实例
// options 配置参数
// - 三个配置属性 root rootMargin threshold
// - root 基于的滚动容器,默认是document
// - rootMargin 容器有没有外边距
// - threshold 交叉的比例

// 实例提供两个方法
// observe(dom) 观察哪个dom
// unobserve(dom) 停止观察那个dom
基于vue3.0和IntersectionObserver封装懒加载指令
src/components/library/index.js
export default {
  install (app) {
    app.component(XtxSkeleton.name, XtxSkeleton)
    app.component(XtxCarousel.name, XtxCarousel)
    app.component(XtxMore.name, XtxMore)
+    defineDirective(app)
  }
}
import defaultImg from '@/assets/images/200.png'
// 指令
const defineDirective = (app) => {
  // 图片懒加载指令
  app.directive('lazyload', {
    mounted (el, binding) {
      const observer = new IntersectionObserver(([{ isIntersecting }]) => {
        if (isIntersecting) {
          observer.unobserve(el)
          el.onerror = () => {
              el.src = defaultImg
          }
          el.src = binding.value
        }
      }, {
        threshold: 0.01
      })
      observer.observe(el)
    }
  })
}
使用指令:
src/views/home/component/home-product.vue
        <RouterLink class="cover" to="/">
+          <img alt="" v-lazyload="cate.picture">
          <strong class="label">
            <span>{{cate.name}}馆</span>
            <span>{{cate.saleInfo}}</span>
          </strong>
        </RouterLink>
src/views/home/component/home-goods.vue
    <RouterLink to="/" class="image">
+      <img alt="" v-lazyload="goods.picture" />
    </RouterLink>
``src/views/home/component/home-product.vue`
        <RouterLink class="cover" to="/">
+          <img v-lazyload="item.picture" alt="">
          <strong class="label">
            <span>{{item.name}}馆</span>
            <span>{{item.saleInfo}}</span>
          </strong>
        </RouterLink>
总结:
- 在img上使用使用v-lazyload值为图片地址,不设置src属性。